Cakes and Cupcakes, Recipes
Little Debbie-Style Christmas Tree Cakes

I’m dreaming of a White Christmas- White Christmas Tree Cakes that is! Celebrate the holidays with Santa’s favorite treat of cake layers filled with a smooth buttercream and coated with classic white frosting.
Raise your hand if you were a Little Debbie® fan as a child?! I sure was, and these little cakes were a staple in our home each holiday season, but are now something we cannot bring into the house due to our food allergies. Like most food allergy Moms I love to recreate foods and recipes sans my children’s allergens, and I did that with these cakes, and the kids went bonkers over them!

For these cupcakes we used our vanilla cake and vanilla frosting mixes. We also used a safe white chocolate for the coating, more white chocolate colored red for the stripes, and green sanding sugar.
Making this cake isn’t hard at all, but describing the entire process takes a little work. Put simply: bake a cake. Cool and cut into trees. Make buttercream. Cut trees in half, sandwich together with buttercream inside. Frost with chocolate. Sprinkle with sanding sugar. Below is a more detailed how-to for making these.
How to Make Little Debbie-Style Christmas Tree Cakes
The first step is to gather all your tools and ingredients. You will need:
Tools Needed:
- Mixing Bowls
- Hand Mixer / Stand Mixer
- Spatulas
- Mixing Spoons
- Measuring Cups / Spoons
- 9″ x 13″ Baking Pan
- Parchment Paper
- Knife
- Stovetop/Double Boiler
- Piping Bag
- Tree Cookie Cutter
Cake Ingredients Needed:
- 1 x Kate’s Safe and Sweet Vanilla Cake Mix
- 1 cup Milk of choice
- 2 teaspoons Apple Cider Vinegar
- 3 1/2 tablespoons Neutral Oil
Frosting Ingredients Needed:
- 1 x Kate’s Safe and Sweet Frosting Mix
- 1/2 cup Butter of choice
- 1/4 cup Vegetable Shortening
- 2 tbsp Milk of choice
- for this frosting you’ll make it slightly softer than usual as it will be used for the filling
Topping Ingredients Needed:
- 12 oz of white chocolate morsels or bars (your choice of what is safe for you)
- Small amount of red food coloring (optional of course)
- Green sanding sugar
Cake Instructions
1. Begin by preheating the oven to 350F. Line a baking tray with parchment paper. Set aside.
2. In a small mixing bowl, combine the milk of your choice with the apple cider vinegar. Let rest for a few minutes.
3. In a large mixing bowl, place the vanilla cake mix. Into this bowl, pour the milk mixture and oil. Mix well until fully incorporated.
4. Spoon batter into prepared baking tray. Bake for 15-18 minutes, depending on the darkness of your baking pan. Cake is done when a toothpick inserted into them removes cleanly.
6. Let cake cool completely before moving onto the next step.
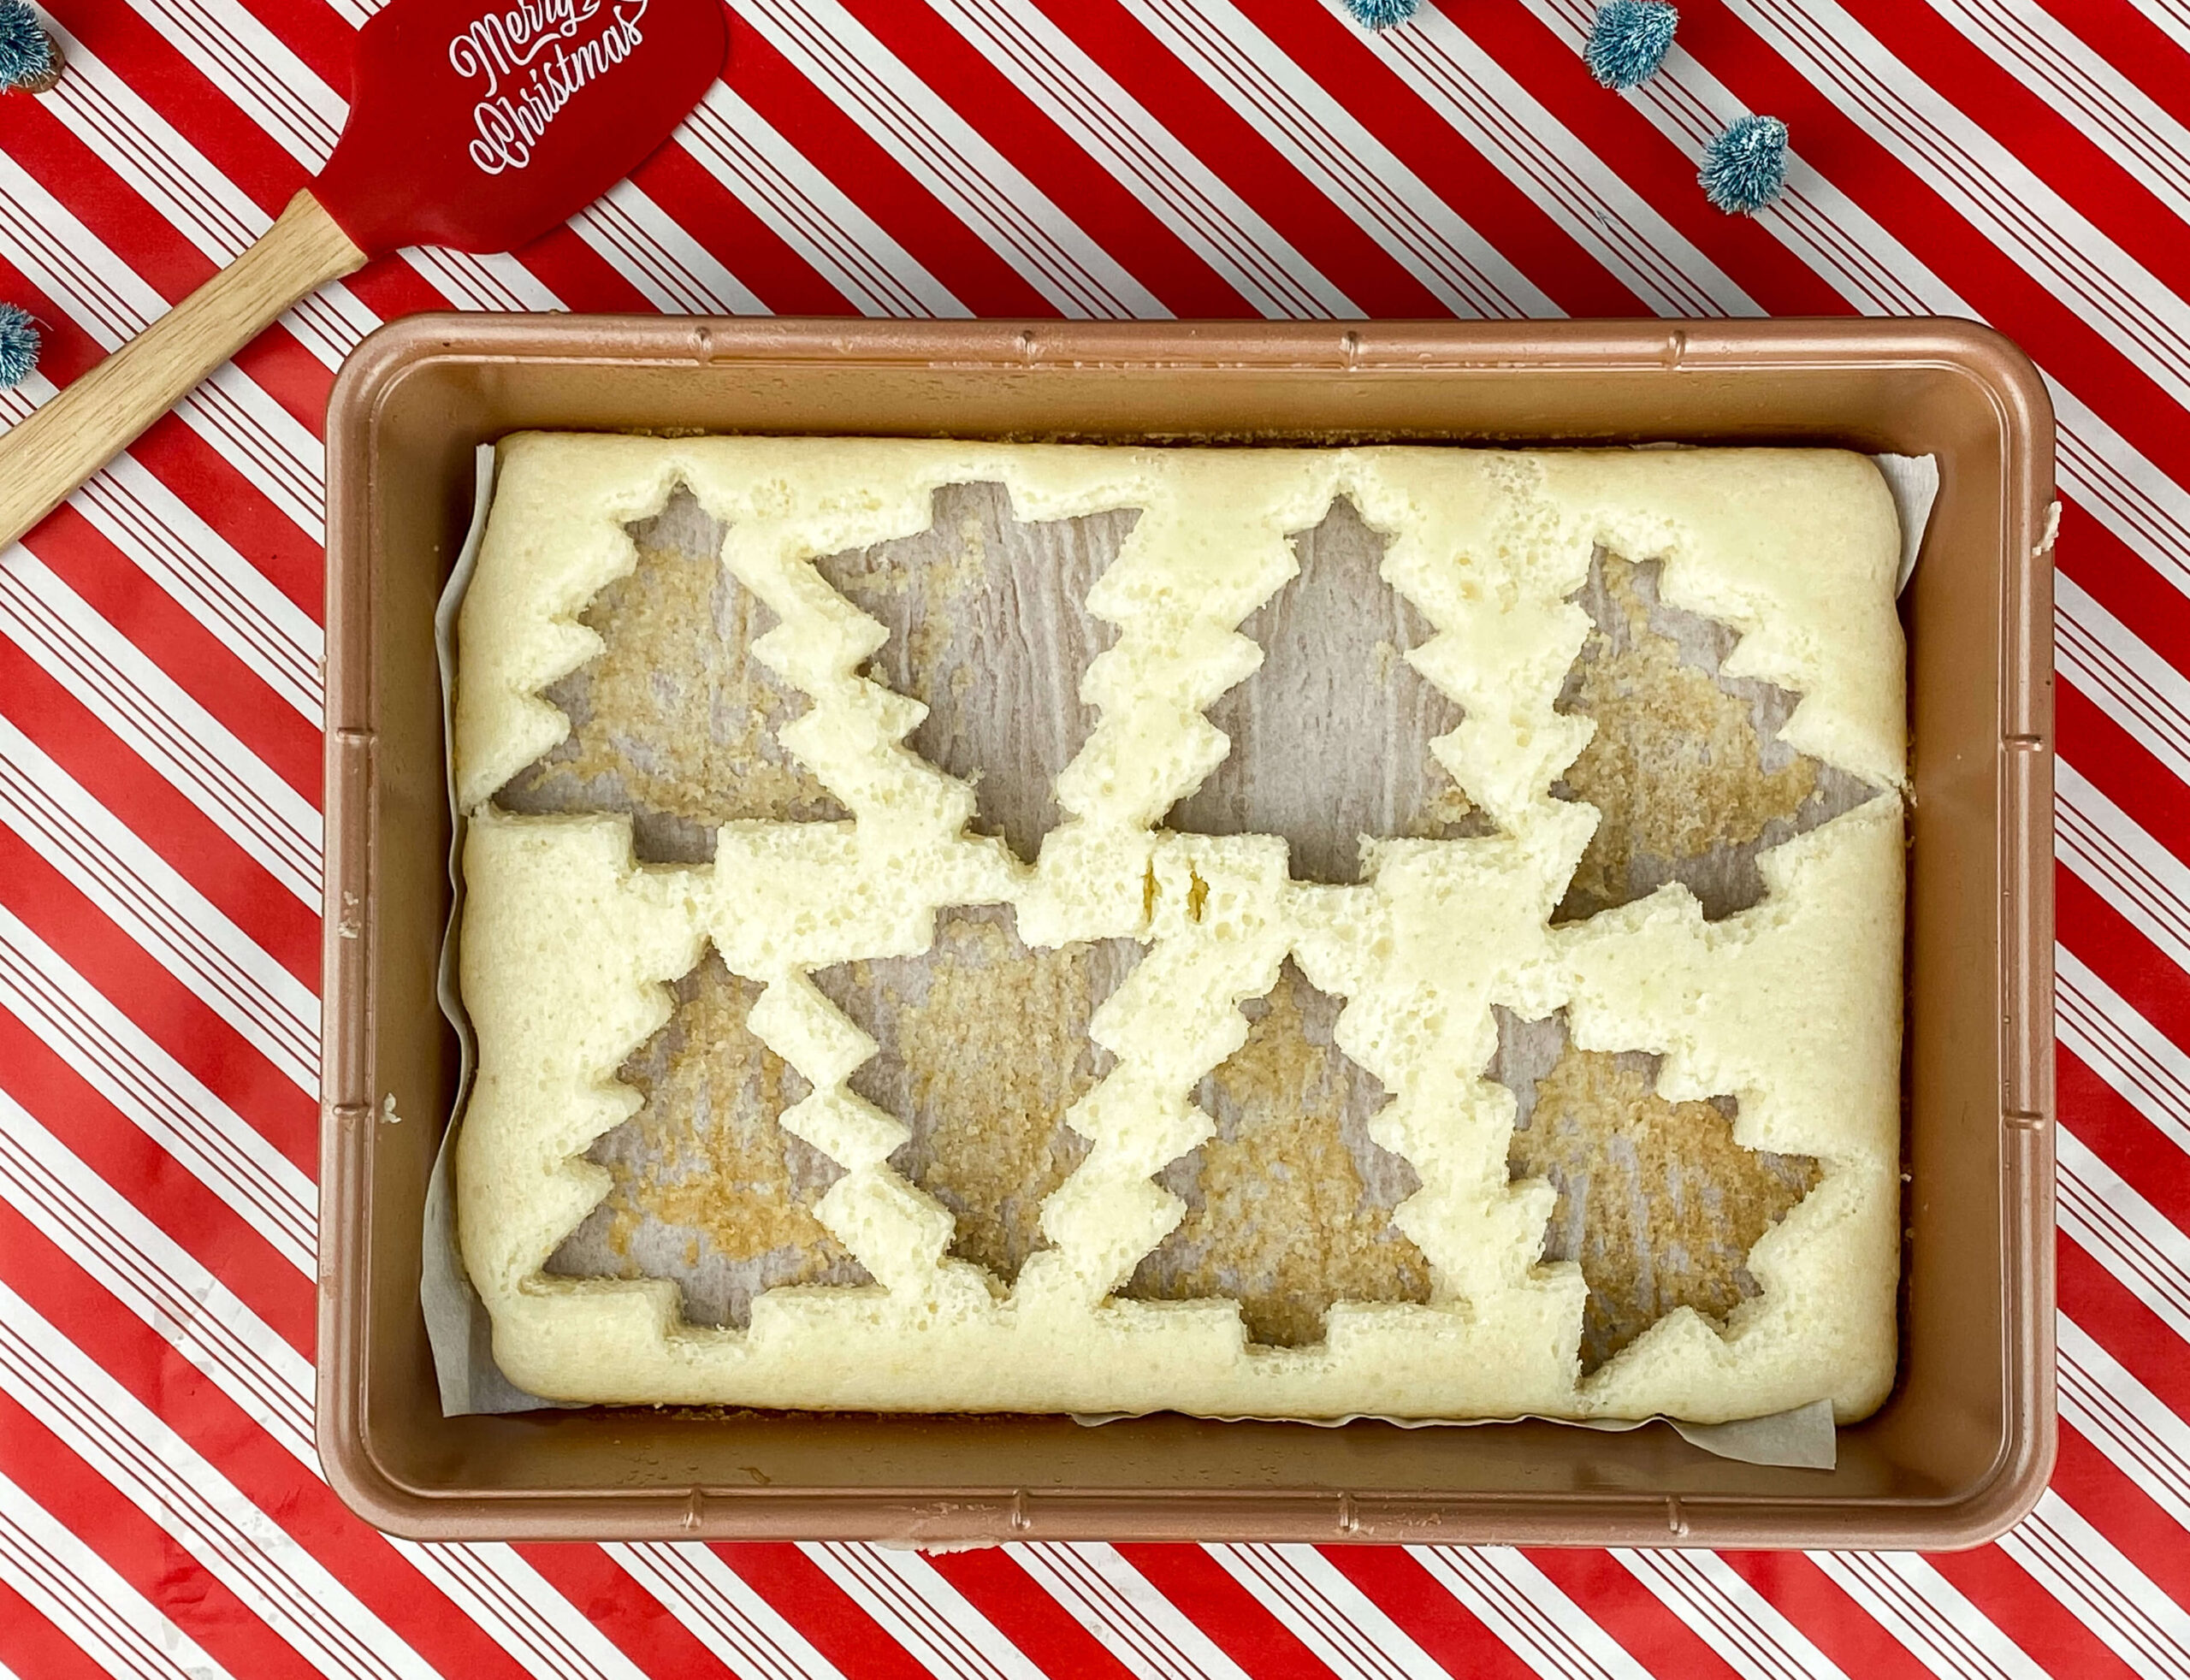
7. Using the tree cookie cutter, cut your trees. We were able to get 8 cakes out of our 9″ x 13″ tray.
Tip: don’t toss the extra edges from cutting the trees, you can use to make cake pops or just eat them as is! Here is the pan without the trees, we set them aside on a separate tray.
Here’s a look at the trees after we cut them. We also used a knife to remove our star as the Little Debbie® version does not have them, but our cookie cutter did!

Now onto making the inside cream.
Frosting Instructions
1. In a large mixing bowl with a hand mixer, or a stand mixer, combine the butter of choice with the shortening. Whip until light and fluffy, about 3 minutes.
2. Add the contents of the vanilla frosting mix. Add 1 tablespoon of milk at a time. Whip again until the frosting is light and fluffy and a little thinner than you would normally make for a cake topping. Add a splash more of milk if needed.
How to Assemble and Finish the Tree Cakes
1. Remove a cake from the tray and cut in half lengthwise.
2. Fill each cake with the vanilla frosting. We used an offset spatula for this part.
3. Repeat for each cake and set aside.
Time to melt your chocolate.
1. Melt the white chocolate over a double boiler or microwave. If you are using a microwave place the chocolate in a medium heat-proof bowl and melt in 20 second increments, stopping and stirring after each increment until completely melted and smooth.
2. Once the white chocolate is melted and smooth remove from heat / microwave and set aside on a heat safe counter or atop a folded-up towel. If you want to make the red garland then place a small amount in another bowl.
3. Taking each tree one at a time spoon on the chocolate atop the cream filled cakes. Set back onto parchment paper.
4. Sprinkle with the green sanding sugar prior to the white chocolate hardening.
5. After each tree is covered with white chocolate and sanding sugar you can move into the red chocolate.
6. Color the set aside frosting your desired red. Taking a piping bag or ziplock bag place inside and cut a small slit from the bottom. Pipe atop each cake as shown.
This part can get a little messy so we made sure to decorate on the baking tray with parchment paper.
After the chocolate is cooled then remove and place onto a plate or serving tray.

These Christmas trees are adorned with a garland of red icing and green sugar sprinkles for a delightful crunch. You’ll want to pour an extra large glass of (your safe) milk to pair with this Christmas favorite!

Filled with cream and coated with white chocolate what is not to love about these little treats.

Don’t forget to check out our other recipes here. Enjoy!
