Easter is coming soon and we made some fun and delicious brownies idea for you. These are easy to decorate and a fun way to have a festive day. We are sharing three different Easter-themed brownies to make:
-
Egg Nest Brownies
-
Bunny Tail Brownies
-
Bunny Patch Brownies
The first step to making these is to make the brownie. We’ll include the instructions for how to make each of these below as well.
Tools Needed:
- Mixing bowl(s)
- Spatula
- Measuring cups
- Hand or Stand Mixer
- Baking Pan (see tips below on what size to use depending on which recipe you want to make)
- Non-stick cooking spray
- Parchment paper
Depending on which dessert you’d like to make, these are the baking pan size to use:
- Egg Nest Brownies – use a 9″x9″ or 11″x7″ pan or a square individual brownie pan
- Bunny Tail Brownies – bake in a mini muffin pan
- Bunny Patch Brownies – use a 9″x9″ or 11″x7″ pan
Ingredients Needed:
- Kate’s Safe & Sweet Double Chocolate Brownie Mix
- 1/3 cup of your Safe Oil
- 2/3 cup of Water
- Non-stick Cooking Spray
(above amounts are what is need to make a full batch. If you are making a half batch adjust ingredient measurements as needed per packaging.) Brownie Mix Instructions:
- Preheat oven to 325°F.
- Line your baking pan with parchment paper and lightly spray bottom and sides with non-stick cooking spray. Set pan aside.
- In a medium bowl, blend the brownie mix, water, and oil together until smooth. Scrape the sides of the bowl as needed.
- Spread brownie batter evenly into prepared pan based on the times on the back of the mix. Note: batter will be thick.
- BAKING TIMES:
- square individual brownie pan 22-25 minutes
- mini muffin pan 22-25 minutes
- 9” x 9” pan 29-32 minutes
- 11” x 7” pan 27-30 minutes
- Remove from oven when toothpick inserted 2 inches from edge comes out clean and allow to cool completely in pan on rack.
Below we’ll walk you through how to make each of these including what additional ingredients you’ll need for them.
Egg Nest Brownies
Tools Needed:
- Mixing Bowl
- Hand Mixer / Stand Mixer
- Spatulas
- Measuring Cups
- Frosting Bag
- Frosting Tip
Ingredients Needed:
- 1 x Kate’s Safe & Sweet Vanilla Frosting Mix
- 1/2 cup butter of choice
- 1/4 cup vegetable shortening
- 2-3 teaspoons rice milk (or milk of your choice)
- Green food coloring (optional)
- Jelly beans or other small candies that are safe for you.
- If you don’t have safe candy option you can use frosting instead to make the eggs. Just be sure to divide the frosting before coloring it all green
Above is to make a full batch of frosting, you likely won’t need a full batch for these. You can make 1/3 or 1/2 the batch (see back of the label for those instructions.). Or you can make a full batch and divide and use for the other options in this post or safe in the fridge for another treat!
Directions:
- In a medium bowl using an electric hand mixer or stand mixer beat the shortening and butter until creamy and smooth
- Gradually alternate adding in the frosting mix and 1 teaspoon of milk at a time. Beat at medium speed until smooth and spreadable. Scrap the sides of the bowl as needed.
- Add green food coloring a drop at a time until you get your desired color.
- Prepare piping bag using a grass piping tip. Add in colored frosting.
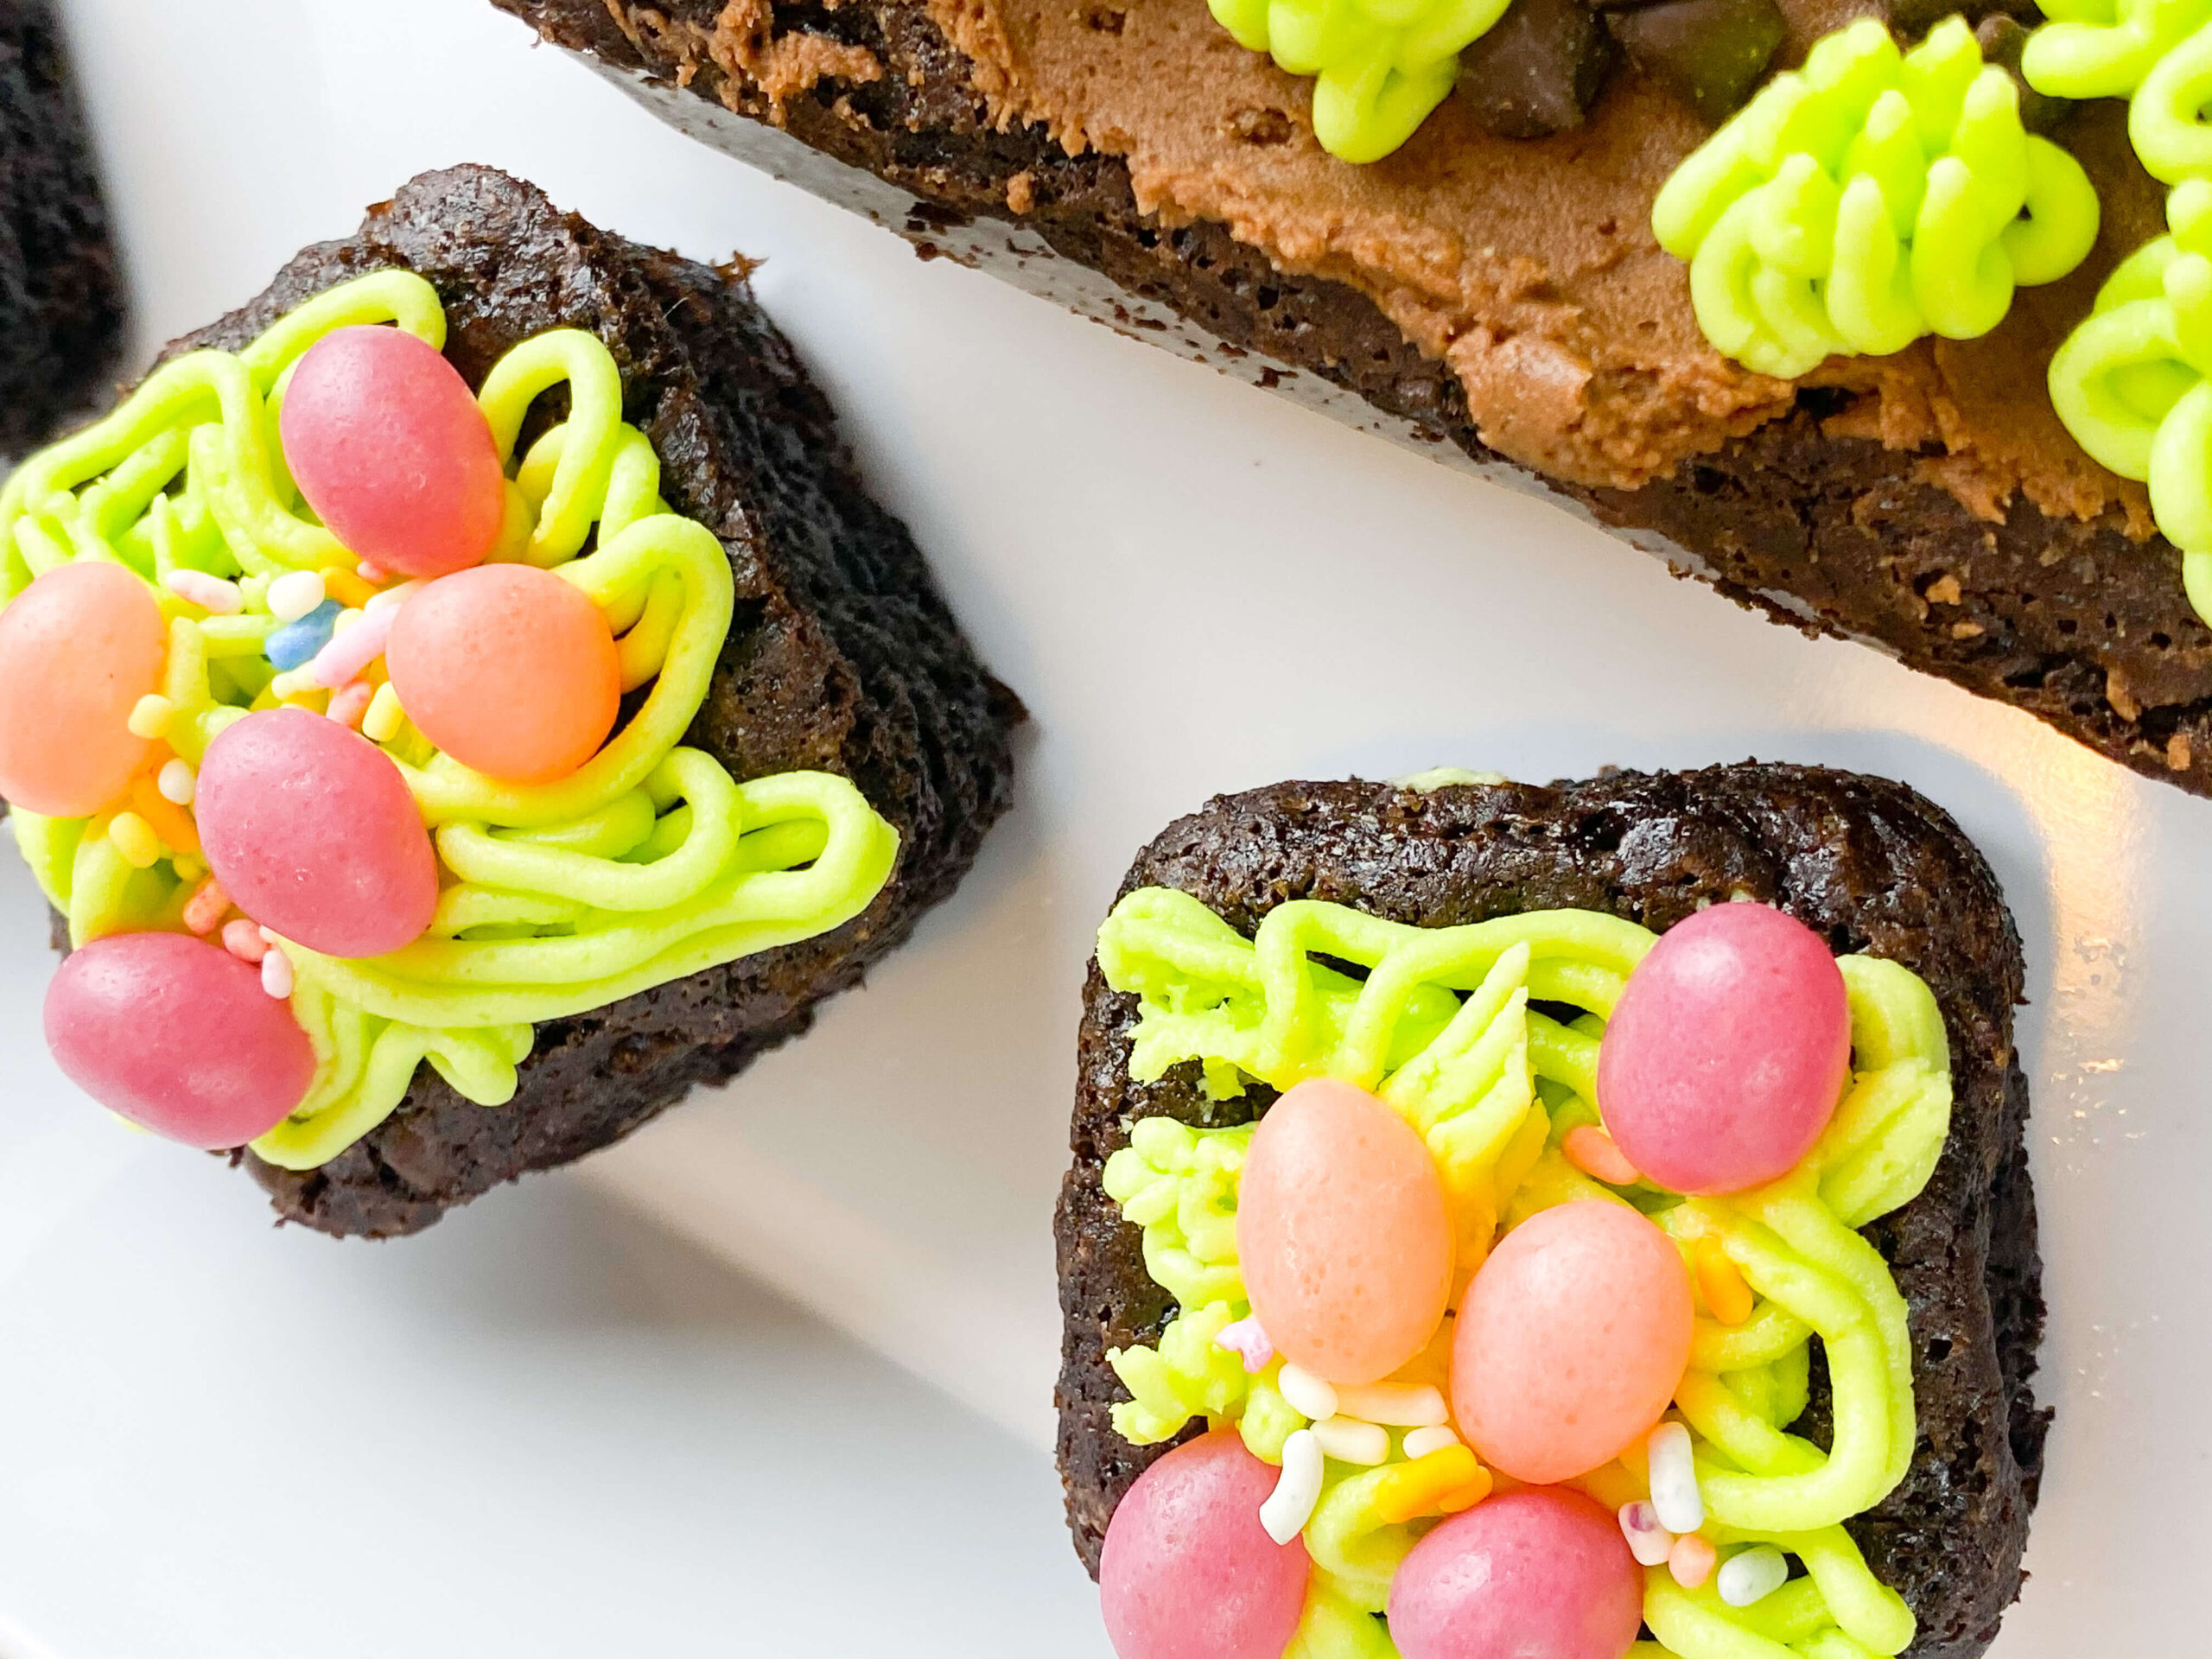
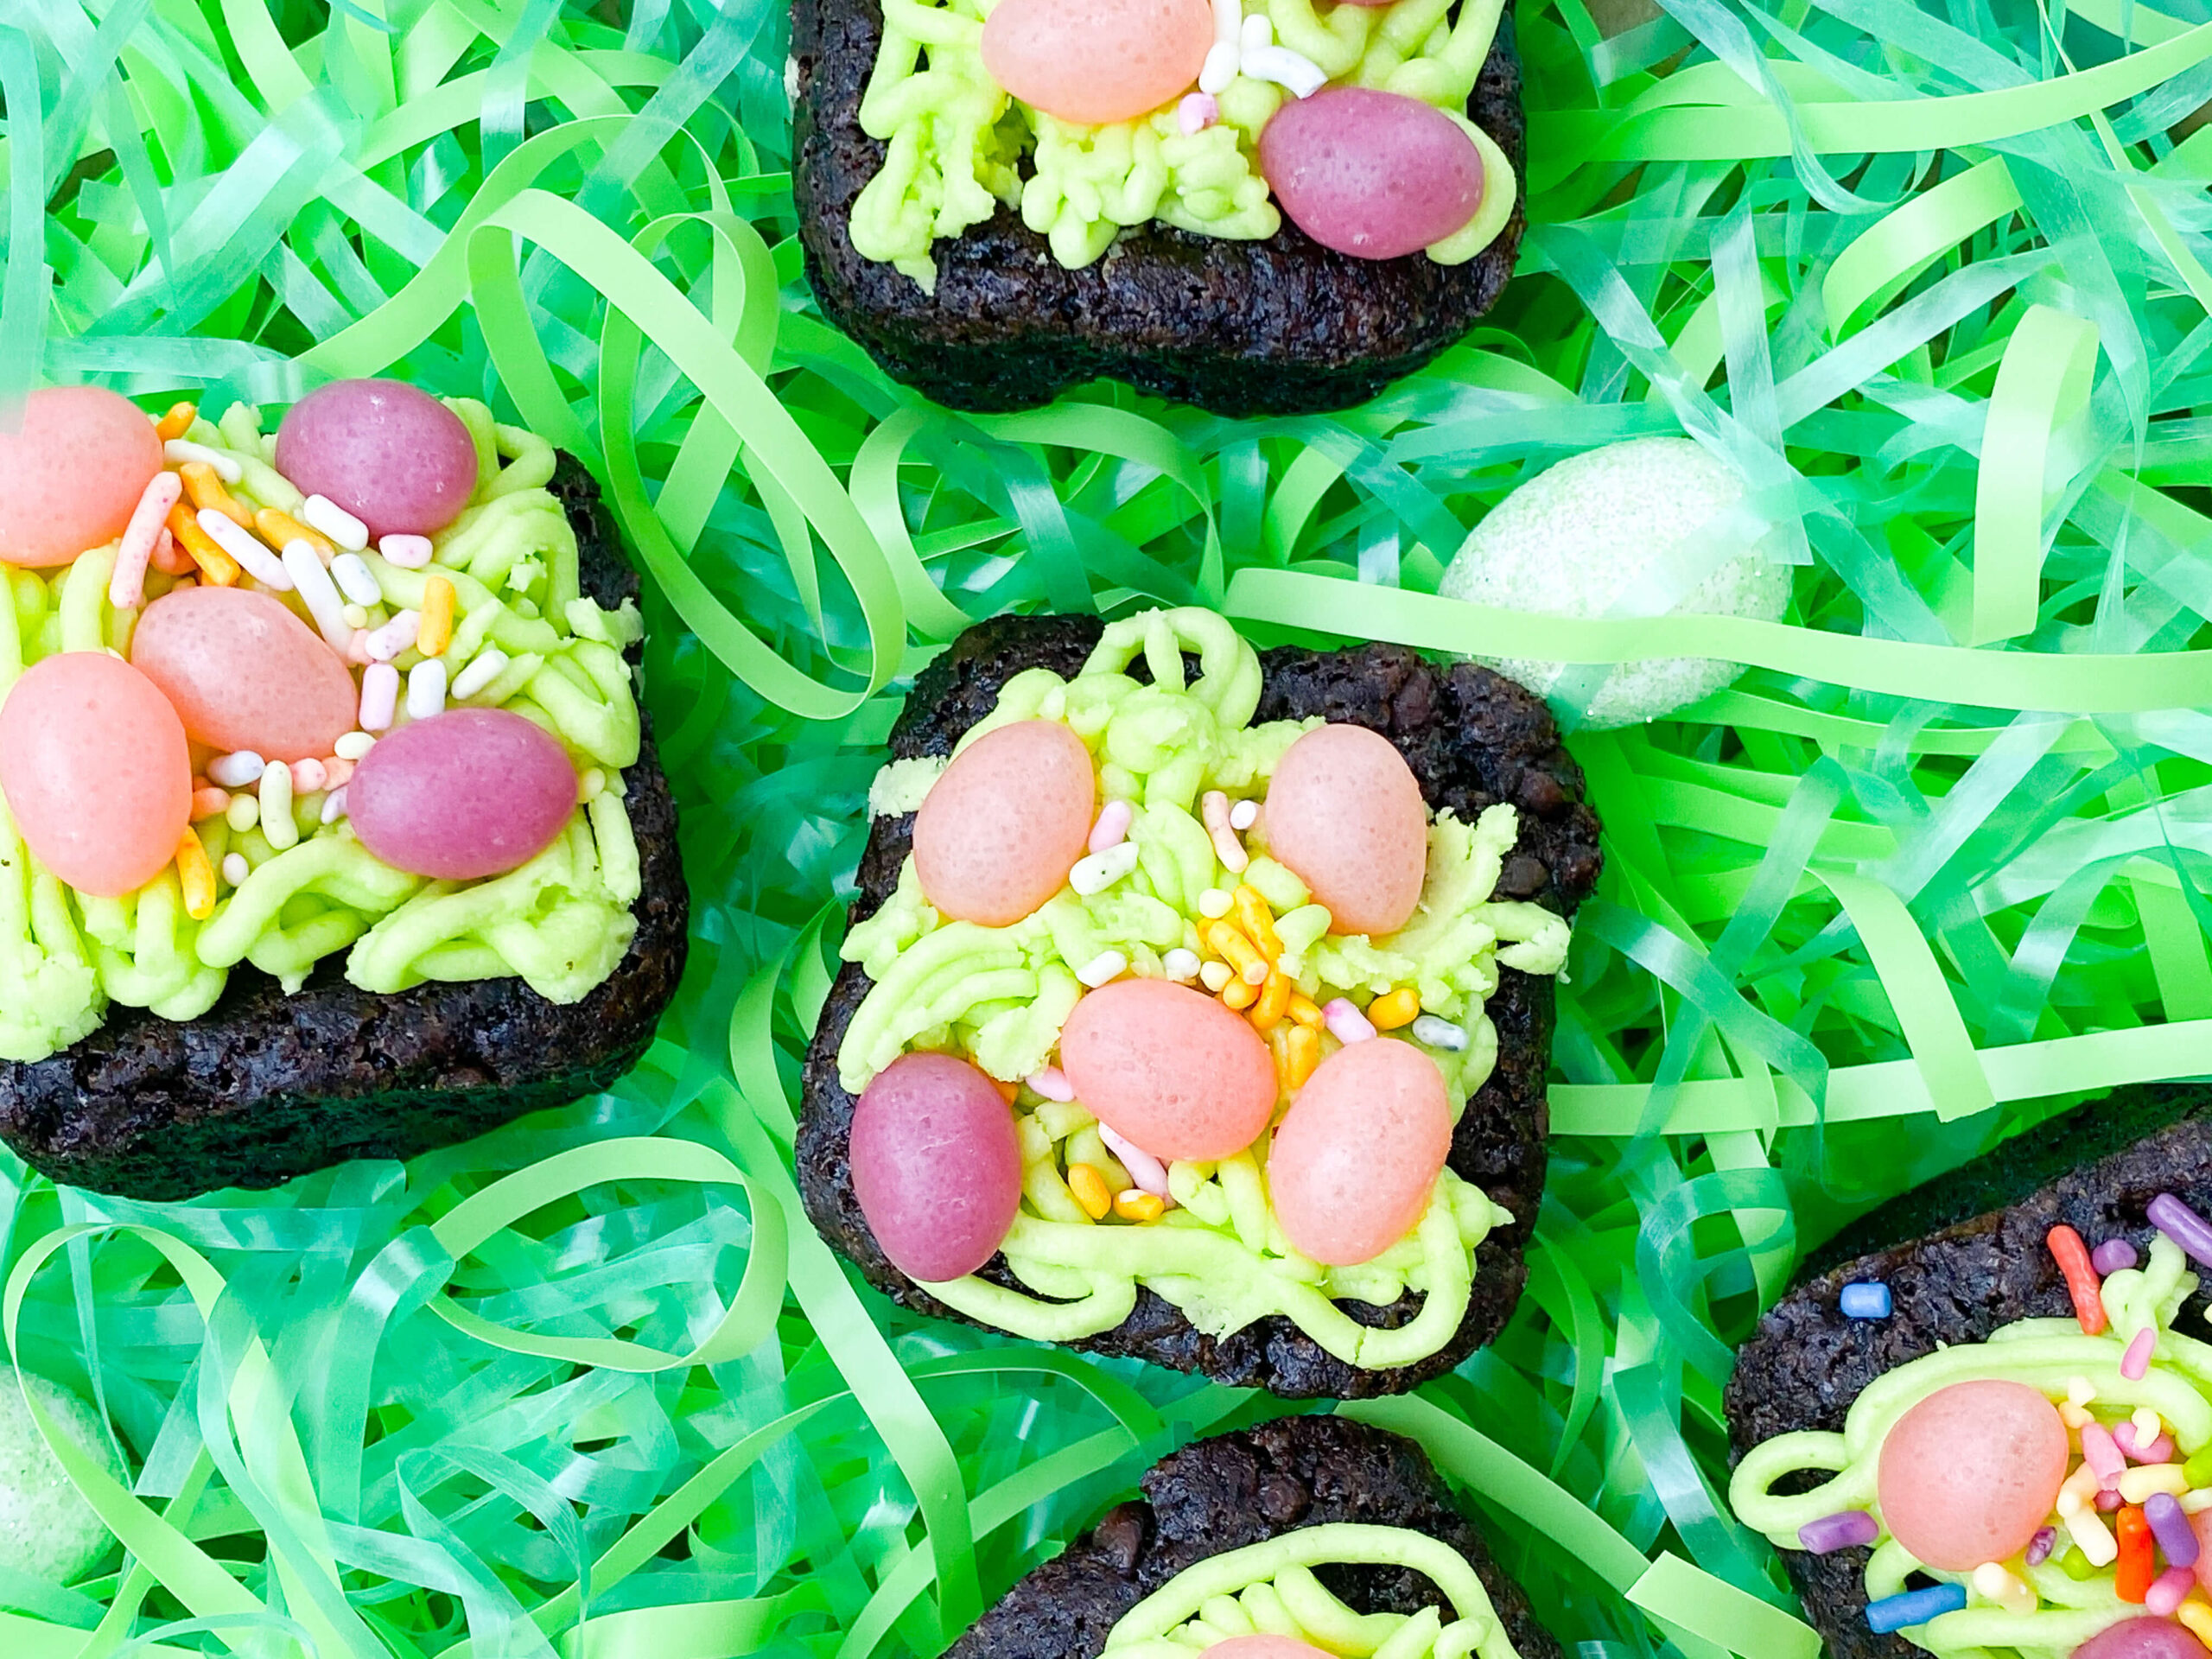
- To assemble the nest egg brownie bites you will need to cut the brownies (as prepared per the above) into small squares (or if you used a small square brownie pan they will be that size to start with.)
- Using the prepared piping bag filled with frosting pipe onto the square in a random pattern. You want this to look like a nest a bird would build – so don’t worry if you’re a little messy here.
- Top with your safe choice of candies. We used YumEarth sour jelly beans. (Use whatever you’d like that is safe for you.)
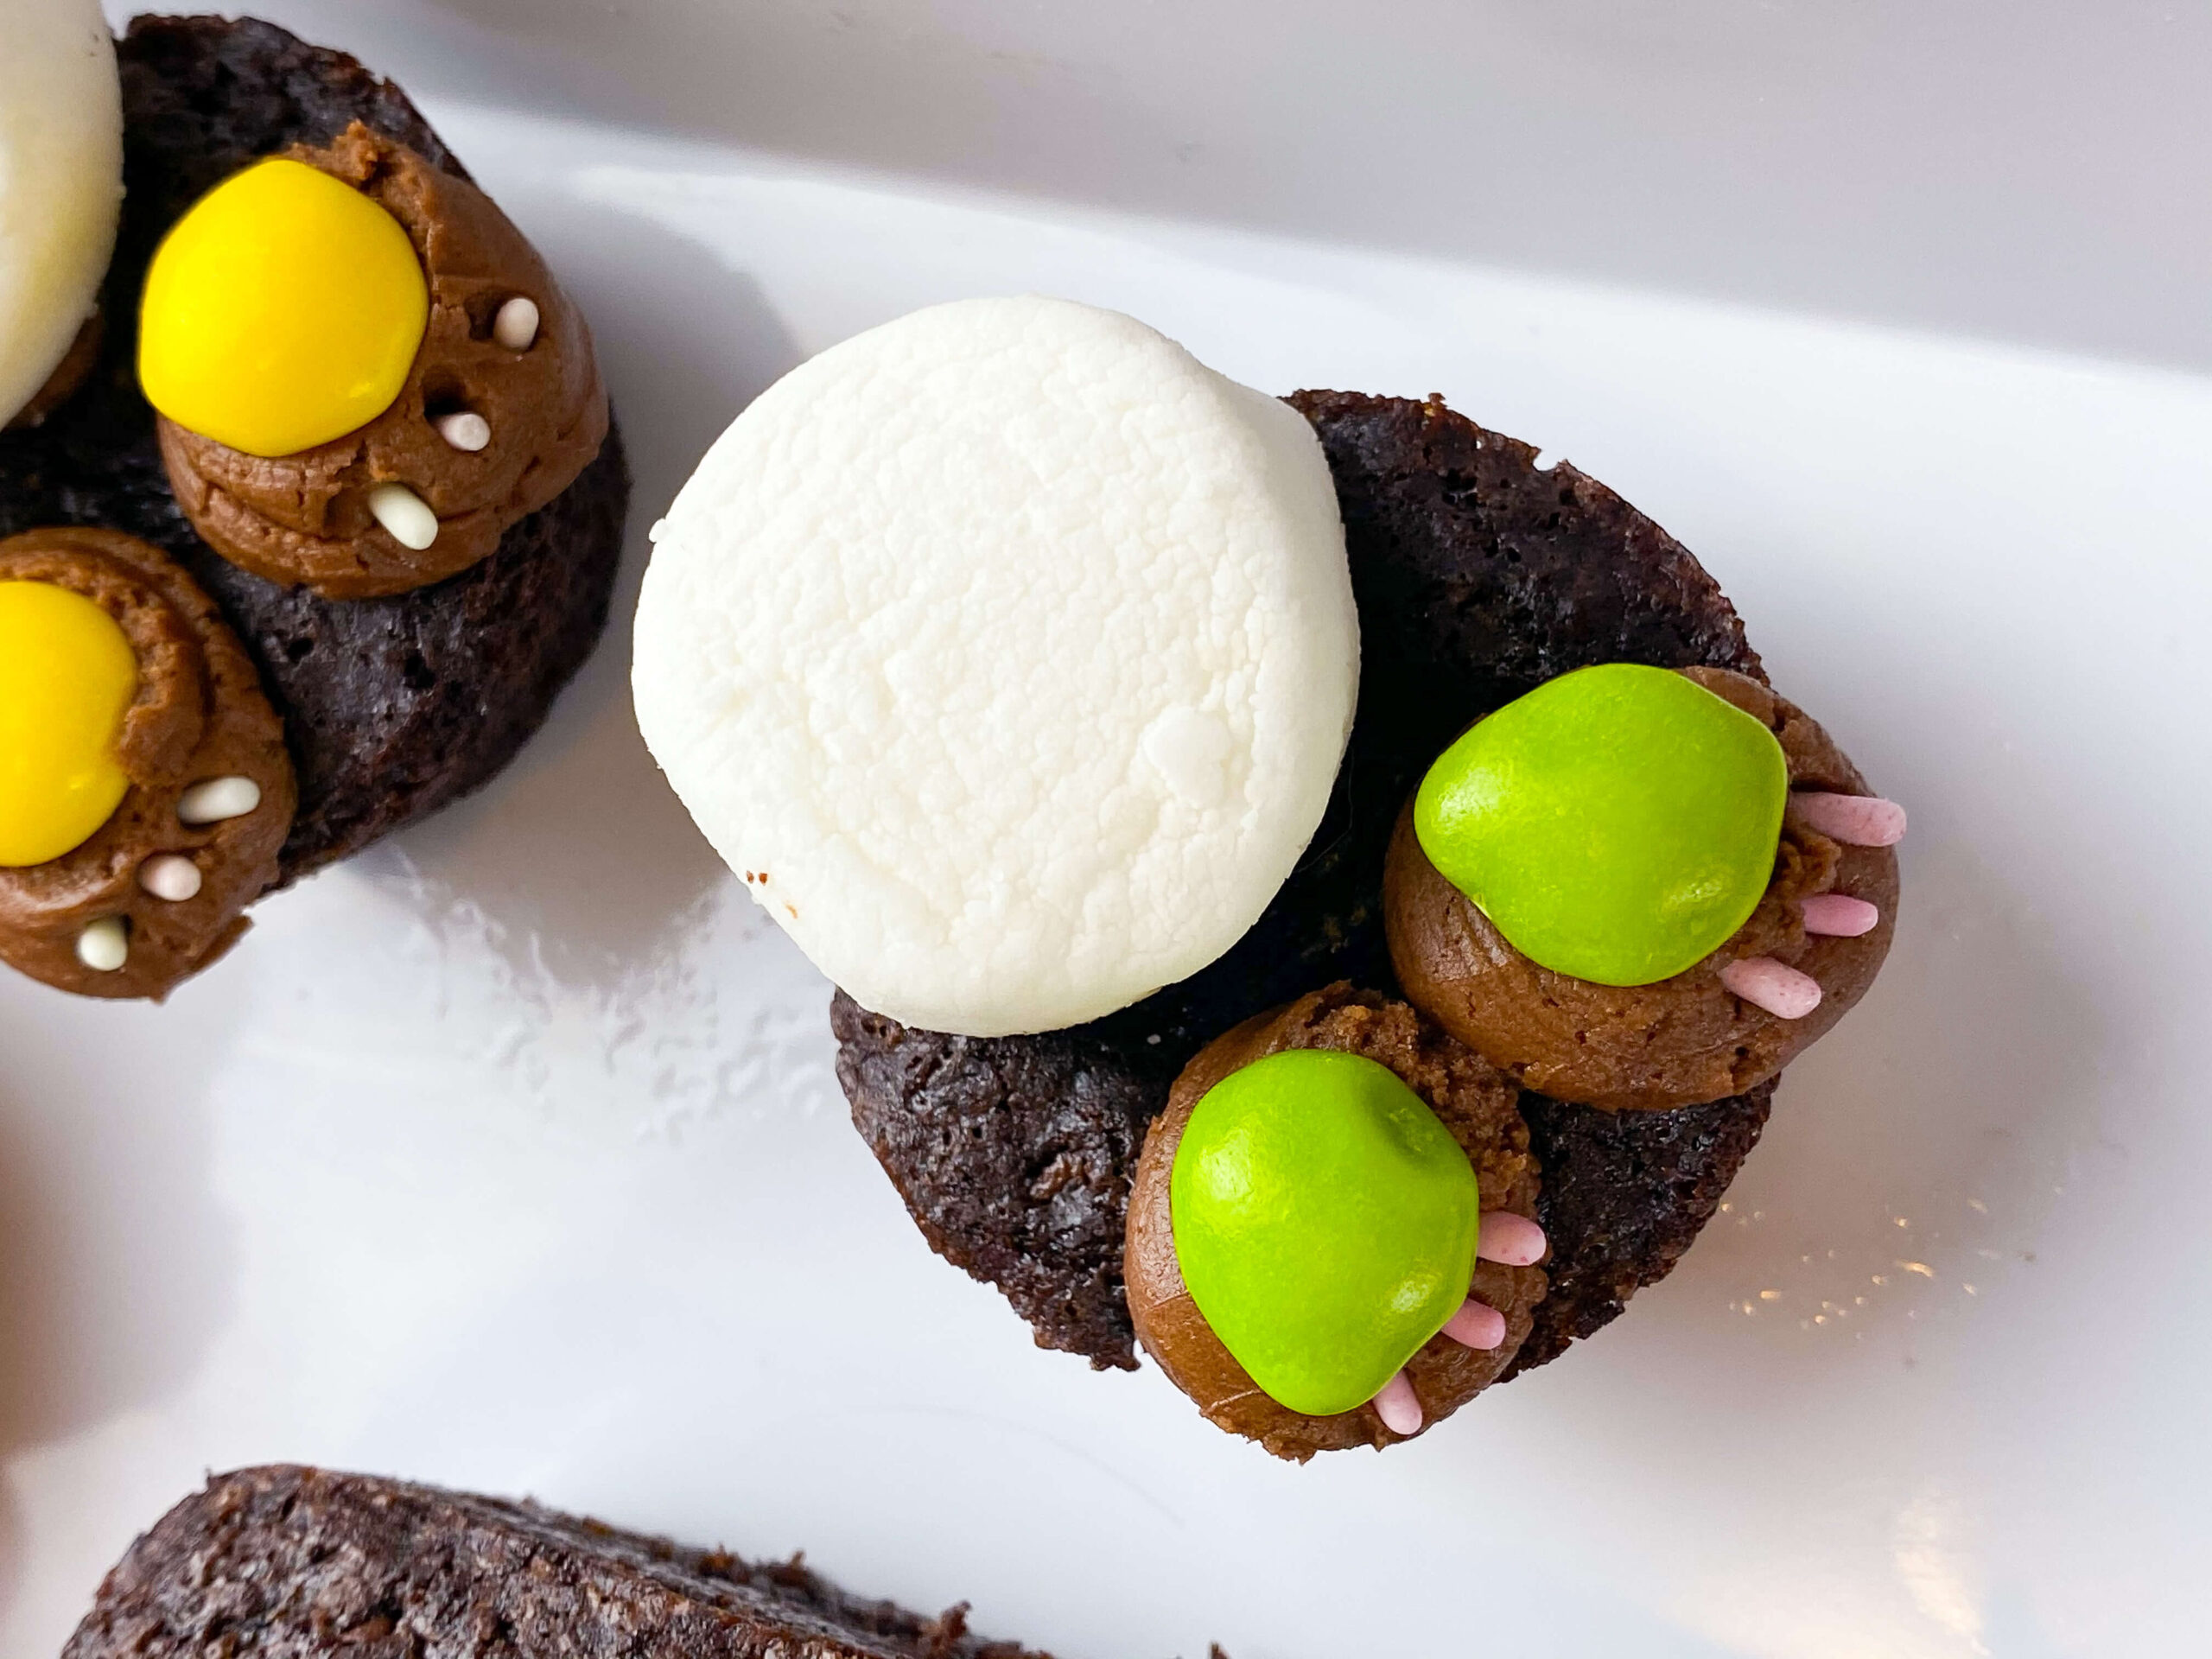
Bunny Tail Brownies
Tools Needed:
- Mixing Bowl
- Hand Mixer / Stand Mixer
- Spatulas
- Measuring Cups
- Frosting Bag
- Frosting Tip
Ingredients Needed:
- 1 x Kate’s Safe & Sweet Chocolate Frosting Mix
- 1/2 cup butter of choice
- 1/4 cup vegetable shortening
- 2-3 teaspoons rice milk (or milk of your choice)
- Large marshmallows
- Sprinkles
- Small round candies that are safe for you.
- If you don’t have safe candy option you can use frosting instead to make the bunny paws.
Above is to make a full batch of frosting, you likely won’t need a full batch for these. You can make 1/3 or 1/2 the batch (see back of the label for those instructions.). Or you can make a full batch and divide and use for the other options in this post or safe in the fridge for another treat!
Directions:
- In a medium bowl using an electric hand mixer or stand mixer beat the shortening and butter until creamy and smooth
- Gradually alternate adding in the frosting mix and 1 teaspoon of milk at a time. Beat at medium speed until smooth and spreadable. Scrap the sides of the bowl as needed.
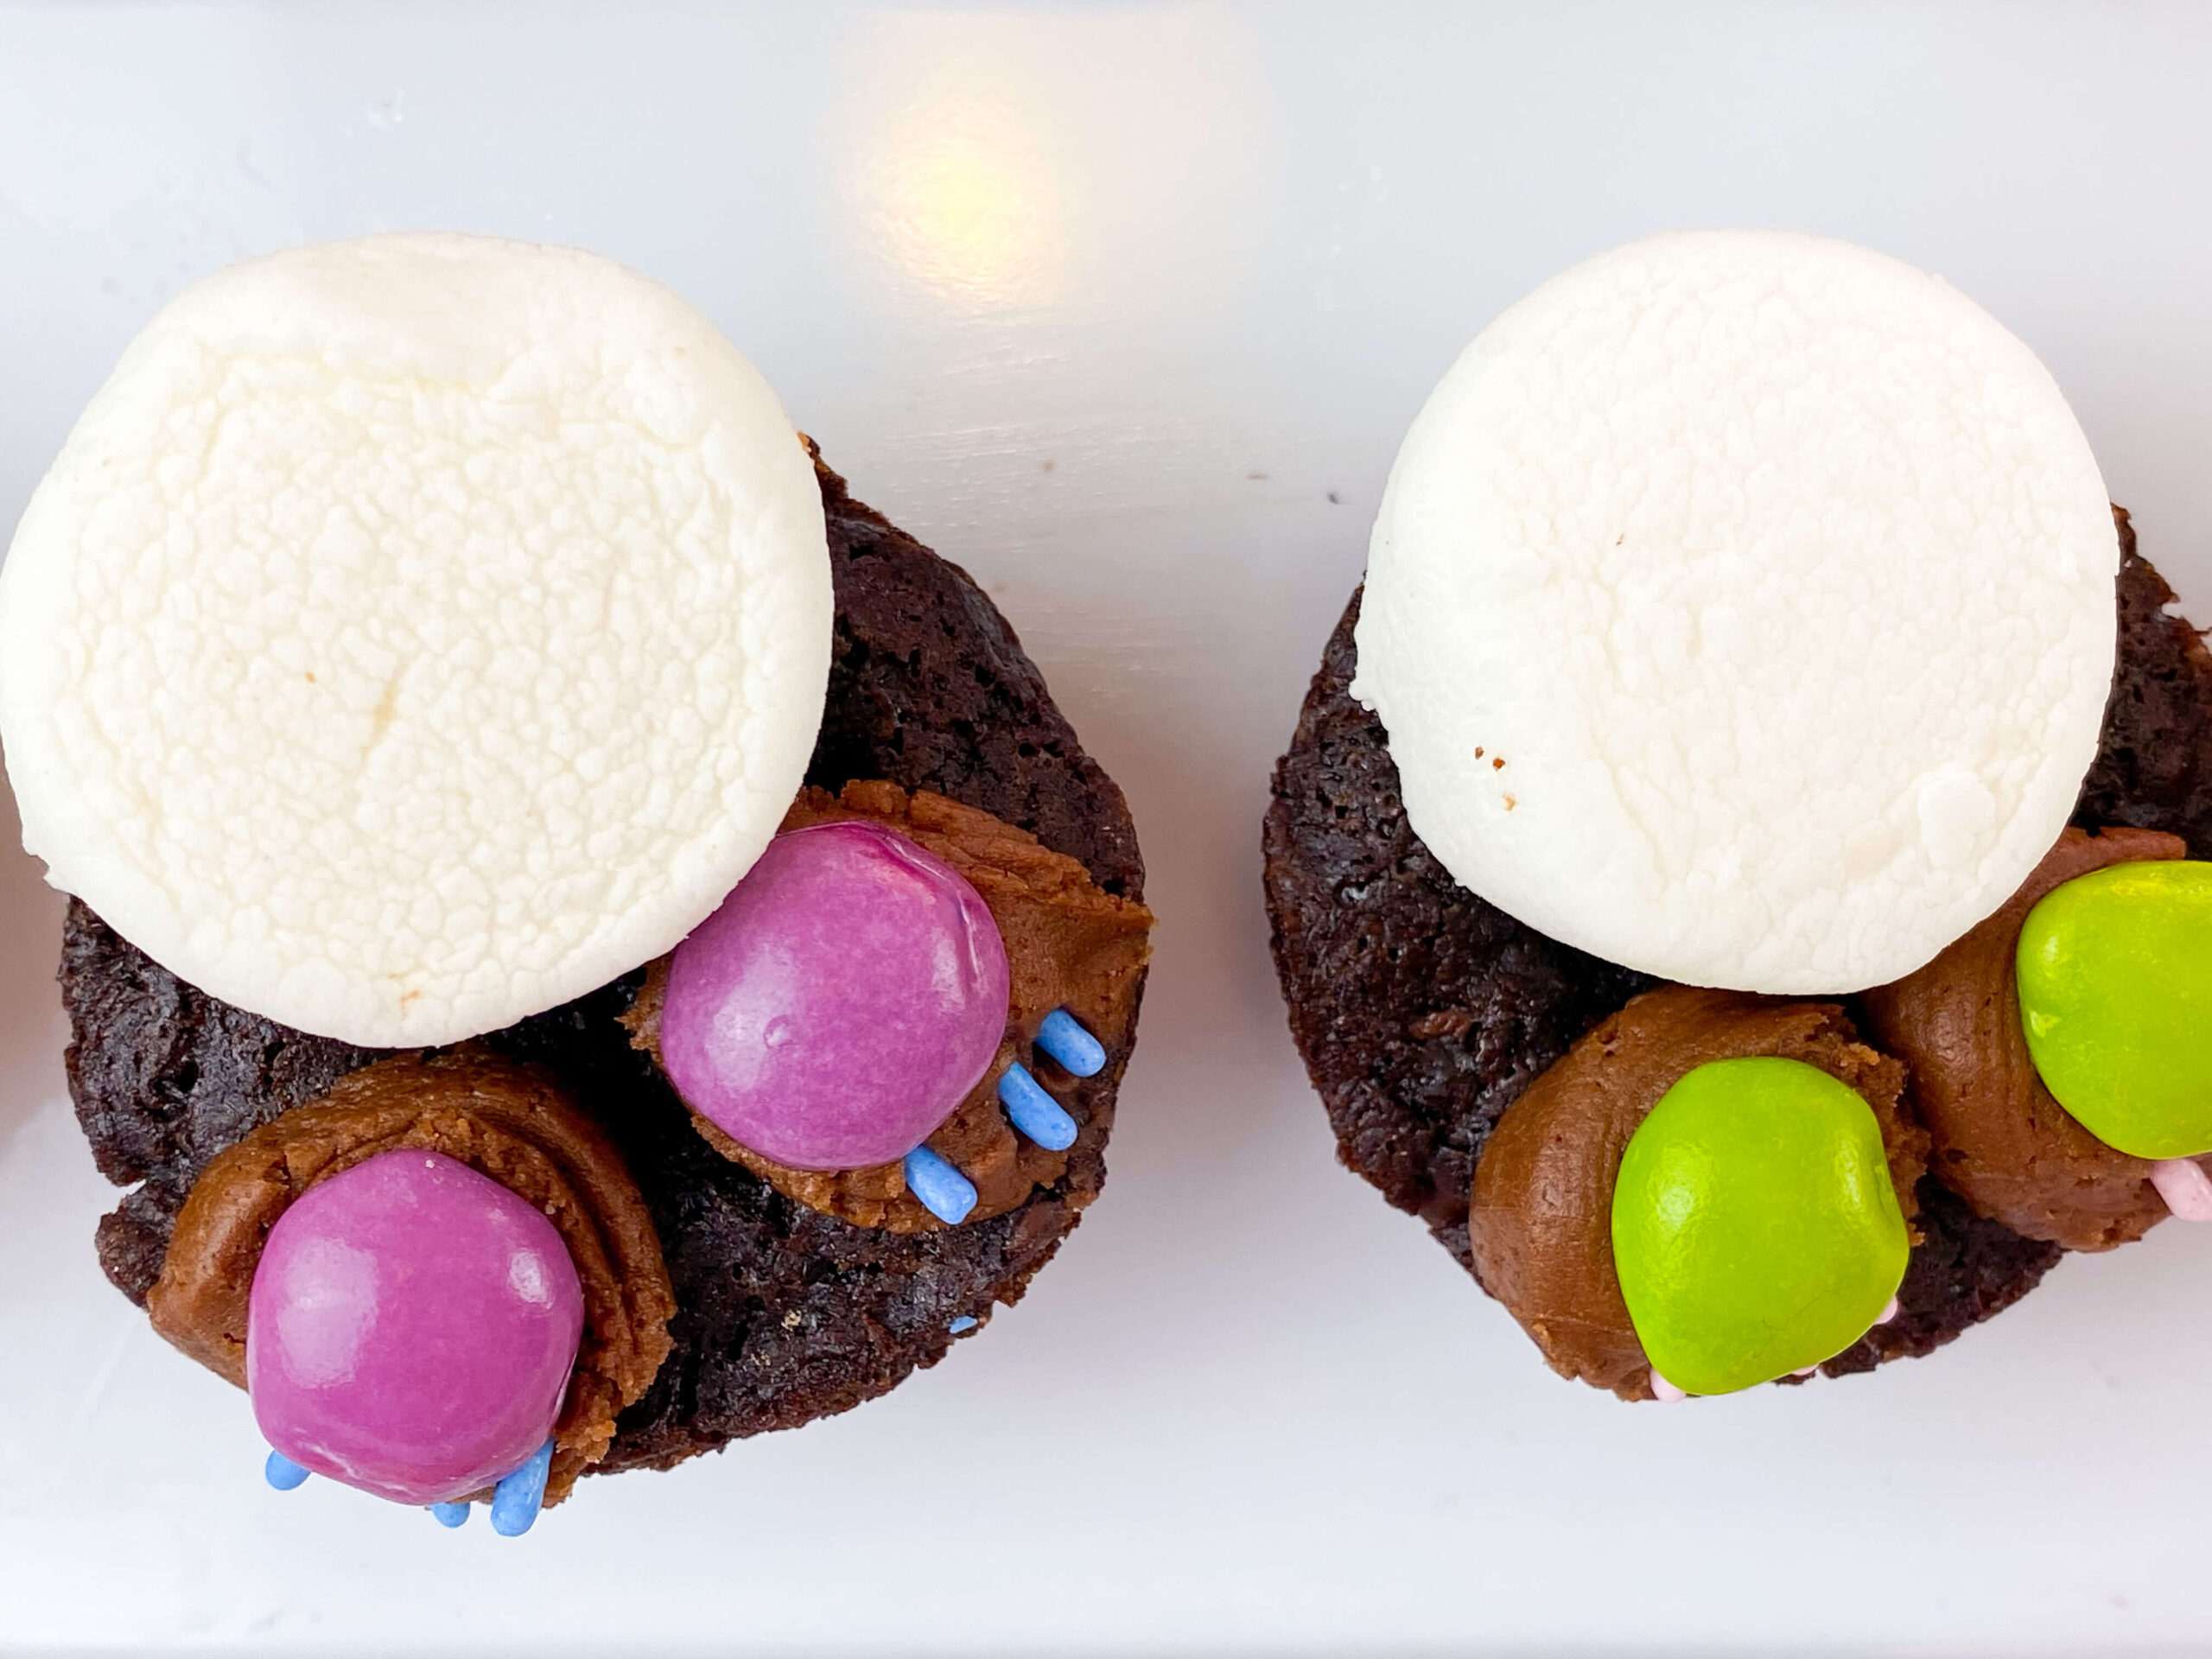
To assemble the bunny tail brownies:
- To assemble the bunny tail brownies take your mini brownie bites (as prepared per the above) and add in a small amount of chocolate frosting for the paws. For the paw pads place your safe candy in the center of those. Add in three sprinkles (same or different colors are fine) to make the little bunny feet. Repeat to make two on each bite.
- Cut your large marshmallow in half and place the sticky side down to make the bunny tail/
These are super cute the kids love making these!
Bunny Patch Brownies

Tools Needed:
- Mixing Bowl
- Hand Mixer / Stand Mixer
- Spatulas
- Measuring Cups
- Frosting Bag
- Frosting Tip
Ingredients Needed:
Chocolate Frosting:
- 1 x Kate’s Safe & Sweet Chocolate Frosting Mix
- 1/2 cup butter of choice
- 1/4 cup vegetable shortening
- 2-3 teaspoons rice milk (or milk of your choice)
Vanilla Frosting:
- 1 x Kate’s Safe & Sweet Vanilla Frosting Mix
- 1/2 cup butter of choice
- 1/4 cup vegetable shortening
- 2-3 teaspoons rice milk (or milk of your choice)
Above is to make a full batch of frosting, you likely won’t need a full batch for these. You can make 1/3 or 1/2 the batch (see back of the label for those instructions.). Or you can make a full batch and divide and use for the other options in this post or safe in the fridge for another treat!
Decorating Items Needed:
- Mini chocolate chips
- Bunny Toppers
- Green & Orange food coloring (optional)
- Green sprinkles
Directions for how to make each frosting:
- In a medium bowl using an electric hand mixer or stand mixer beat the shortening and butter until creamy and smooth
- Gradually alternate adding in the frosting mix and 1 teaspoon of milk at a time. Beat at medium speed until smooth and spreadable. Scrap the sides of the bowl as needed.
For the Vanilla frosting:
- Divide frosting into two bowls. You’ll need green food coloring for the grass and orange food coloring for the carrots.
- Add colors into the bowls a drop at a time until you get your desired color.
- For the green, prepare piping bag using a grass piping tip. Add in colored frosting.
- For the orange just use a piping bag without a tip. Add in colored frosting. Snip the end about 1/4″ up from the bottom.
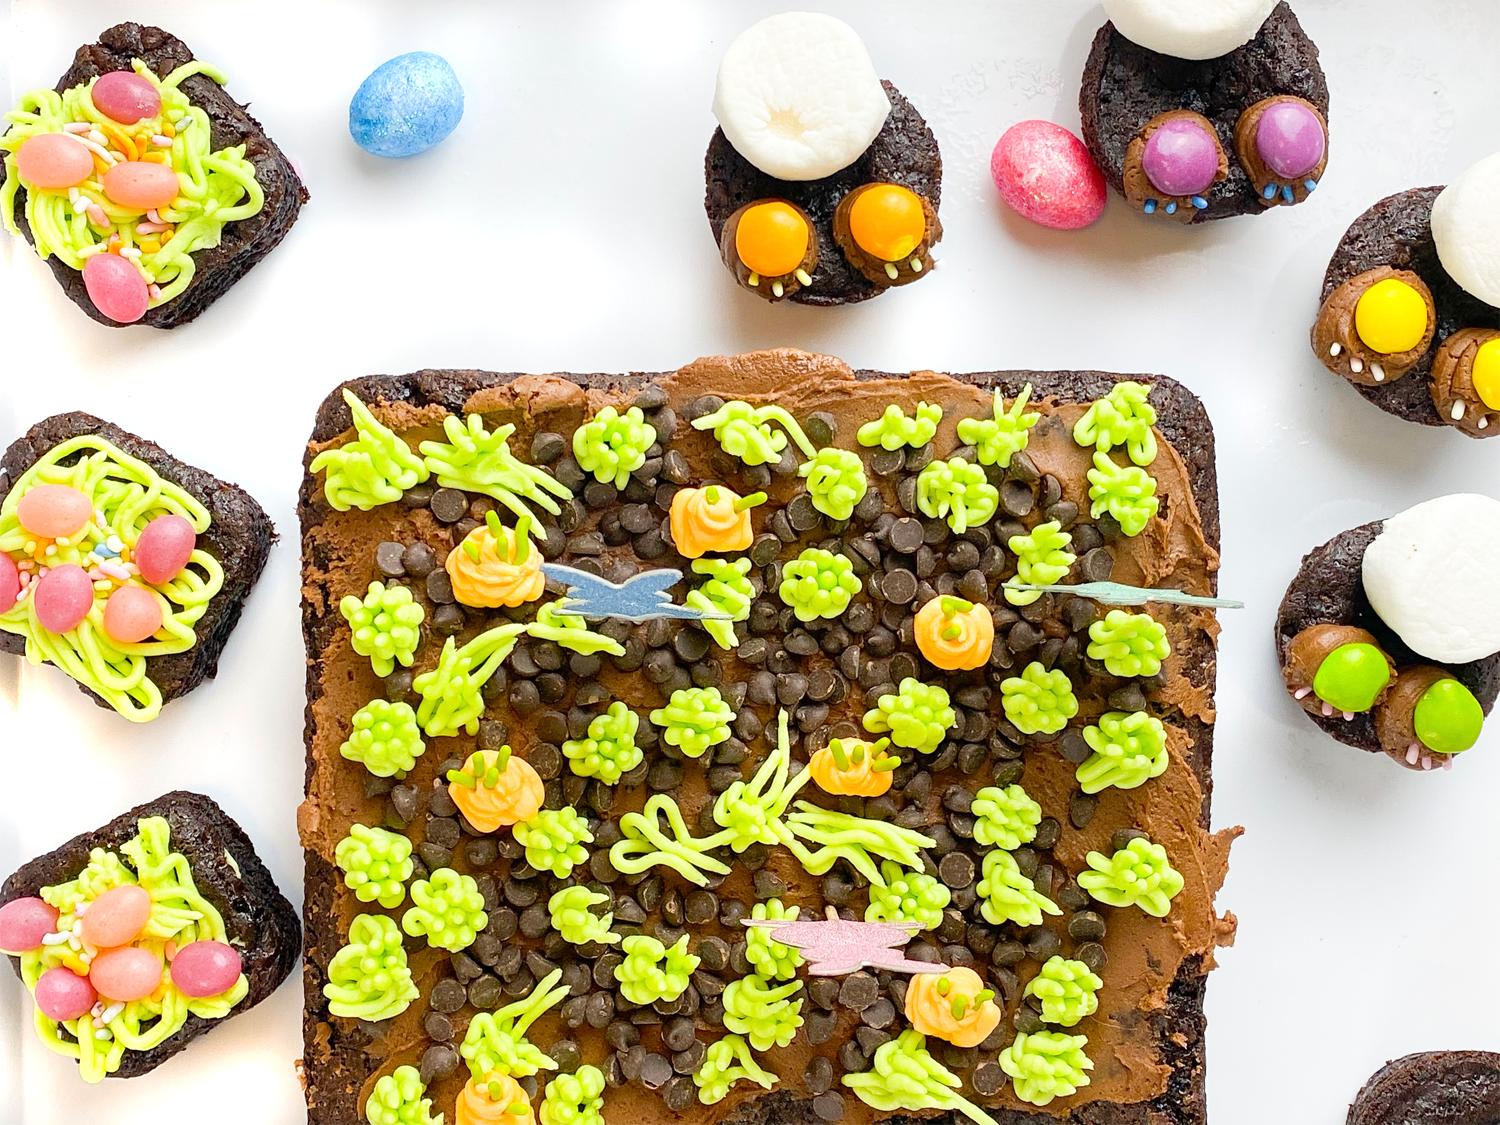
To assemble the bunny patch brownies
- To assemble the brownie batch brownies you will need to use a tray of brownies (as prepared per the above) uncut.
- Using the chocolate frosting top the brownies. This is easy to do with an angled spatula.
- Top with mini chocolate chips.
- Using the prepared piping bag filled with green frosting pipe on patches of grass. Kids love this part!
- Using the preparing piping bag filled with the orange frosting make your carrots. These look like they are slightly coming up from the ground ready to be picked.
- Using green sprinkles add them on top of the carrots. Use as made as you’d like.
- Top the brownies with the bunny toppers!
Now you have a fun and delicious bunny patch!!
Hope you have a happy Easter!
